
This June, we are heading to La Paz, Mexico for a missions trip. We will be serving alongside of a church there and loving on the community. With great missions opportunity comes much fundraising responsibility! So, for our annual Easter egg hunt at Bob’s Corn and Pumpkin Farm in Snohomish, WA, I helped host a bake sale. Baking is not my strongest suit. I can hold my own in a kitchen, for sure, but the science to baking has sometimes bit me in the behind.
I decided to opt in for something easy, yet cute and fun to sell – Mini Individual Naked Cakes!
Frosting on cake, for me, is often a downfall. There’s too much of it to eat, and it’s really hard to get the sides to look pretty and even. But with naked cakes, I only had to frost the middle! Yay!
Ten boxes of cake mix and eight cans of frosting later – I capped the event off selling 32 naked cakes alongside, DOZENS (if not over a hundred) other baked goods. With the entire event hosting around 4,000 people – we sold out of every last treat!
Check out some pictures from the event and the details on how to duplicate these super easy naked cakes!

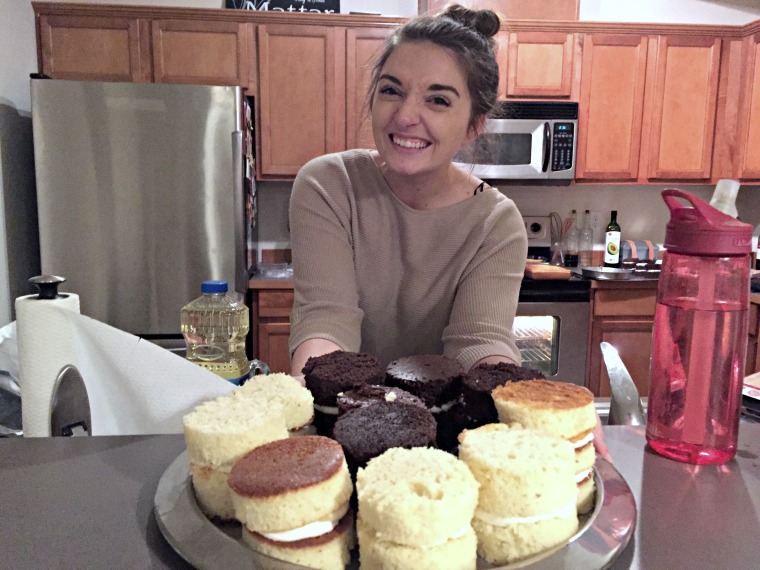
Excuse the mess – but making 10+ cakes in four hours DESTROYED my kitchen! I started off with boxed cake mix. When baking for a fundraiser you want to keep your cost low, so that profit is high! This box mix only needed eggs and veggie oil and cost $1.00 per box. Each box of cake makes approximately three mini naked cakes.
Tricks of the trade when baking these: don’t fill the pan like you would with a normal cake. You want thinner layers, not super thick. It will cook faster, cut easier, and stack better. I learned this towards the end of the process and it would have saved me a lot of hassle had I figured it out sooner.

After you’ve baked your cakes and let them cool a bit, use a cookie cutter or biscuit cutter to get these mini round layers.

I was going for consistency in height, which means that some cakes got three layers, and others got two, depending on the thickness of the cake pieces. I piped the frosting in the middle layer instead of spreading it – this is MUCH easier! An easy frosting “piping” trick is to use a plastic sandwich bag and cut off a small piece of the bottom corner. This allows you to fill it with frosting and have a small tip for frosting the cake.
TADA! All the layers are done – time to let them refrigerate overnight. This helped the frosting to set so that the cakes were stable when decorating the tops!
I did four different flavors of cake and three different frosting flavor combos. These ones were my “party” cakes! Funfetti cake, vanilla frosting, sprinkles and a topper for decoration!
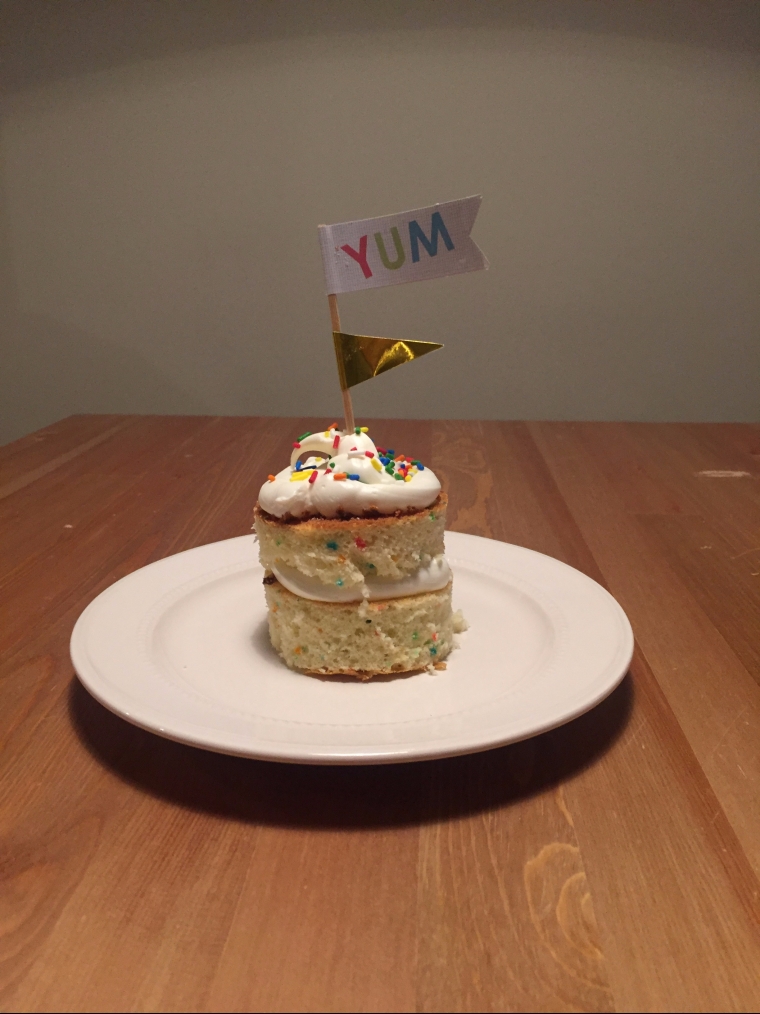
I used the “Funfetti” cake as a bit of inspiration for the bake sale theme! Bright whites with pops of color made this confetti theme a success. Presentation matters – when people walk by they notice how something looks and hit will help you sell better.
I designed the banners and signs to go with the theme courtesy of a confetti graphic by freepik.com. You can snag these to use for your event too:
BAKE*SALE Banner (print each letter and cut!)
BAKE*SALE Banner (2nd option, print each pennant and cut!)

I am entirely obsessed with these confetti balloons! Great at attention drawing and super fun to play with. We snagged these from Target for about $6.00 a piece.


Here’s the finished product of two more flavors of cake! Vanilla with peony toppers and chocolate with confetti colored hydrangeas!


It wouldn’t be a bake sale without incredible volunteers! Our students are raising money to head out on this missions trip and they’re doing it with joy and hardworking attitudes! Can’t wait to head to Mexico with all of you! 

xoxo -A
